C
CDN
0
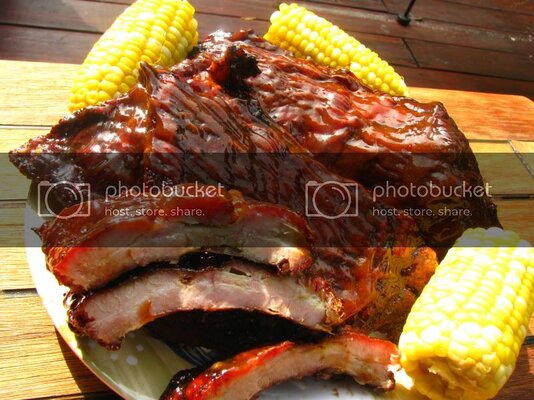
The last time my wife, kids and I came out to the great State of Oregon to visit her parents, my father-in-law was craving some "Georgia Style" smoked ribs. So I stuck a couple of pieces of pecan wood and some of my BBQ rub in my suitcase and away we went. He was worried that without an offset smoker, maybe they wouldn't turn out as good, but I told him, "Fear not, you have a Weber Kettle!" In a world where expensive ceramic cookers and high dollar towable smokers seem to be the "thing" to have, the good ol' Weber Kettle sometimes get lost in the maylay. But I'm here to tell you, don't be fooled friends - the Weber Kettle is more versatile than you think. Not taking away from the ceramic cookers, they are wonderful pieces of equipment that perform their respective jobs flawlessly. But for what they cost, you should expect nothing less. With a few tricks of the trade and a little practice, you can turn out absolute BBQ masterpieces on the Weber Kettle. Here's a how to on Baby Back Ribs that will make your Big Green Egg neighbor Green with envy!
Here's what you'll need:
Loin back ribs, 2 racks (if you need to cook more, use a ribrack)
Oldwoodfire Grill KK's 10 BBQ Rub
Lump charcoal, or briquettes
Pecan, hickory, apple, or cherry chunks
Aluminum pie pans
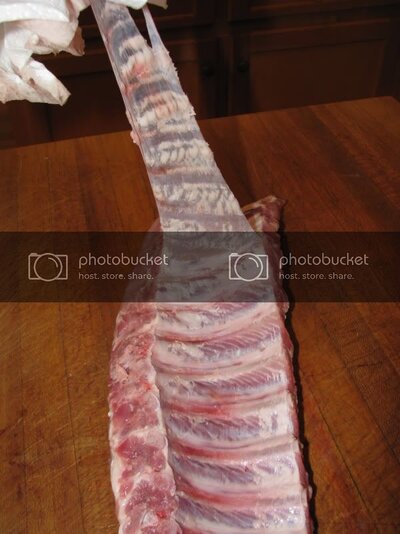
Start out by firing up the Weber with a chimney full of lump charcoal. Don't let it get completely burning though, infact as soon as it starts to burn a little, dump it in, banking it far to one side.If you have the Weber charcoal trays, even better. Add a chunk of your favorite wood, such as pecan, and let it start to burn a little. The wood can be presoaked in water or dry, whatever you like or have had good luck with previously. I always throw mine in dry, but if your a newbie or experimenting, I would suggest soaking the wood for a few hours prior to cooking. Place an aluminum pie pan next to the fire on the charcoal grate and fill with water. The position of the pan will be the cool side, directly under where the ribs will be placed on the cooking grate. Place the cooking grate into position and place another pie pan over the coals and wood and fill it with water also. Place an oven thermometer or other type grill thermometer in the center of the grate. Close the lid and let the grill warm up a bit. Ideally, you want to get up to 250 degrees, but 275-300 is okay. I would not let it get above 300 degrees. If you see this start to happen, adjust the bottom vent to choke off some of the airflow, or spritz the fire lightly with water from a spray bottle. Back inside, remove the membrane from the back side of the ribs. You can do this by slipping a spoon under the membrane to seperate it from the meat, then grabbing it with a paper towel and peeling off.
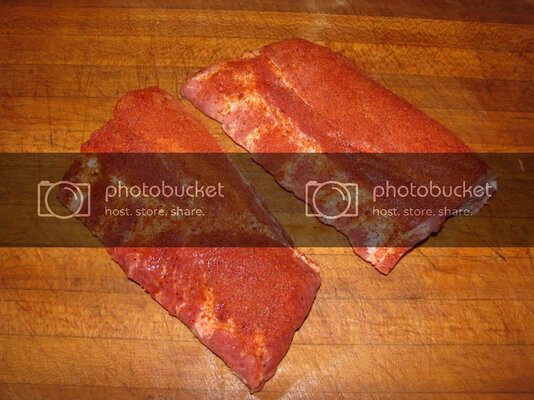
Coat both sides of the ribs with a liberal amount of Oldwoodfire Grill KK"S 10 BBQ Rub or your favorite rub, and cut the rack in half to easier fit on the grill.
Once your fire has evened out and you have light smoke from the grill, place the racks of ribs on the cooking grate on the cool side. If you are doing two racks and don't have a rib rack, you can stand them up "tent" style such as this. (Note: if one of the racks in this picture looks like a really thin rack of spares, it is. We had a really pathetically thin rack of spares in the freezer that really needed cooked, so I threw them on there. For normal size spares, I would cook them the same way, only increase the cooking time by 1 to 2 hours, depending on various factors. But we will get into that in a later post.)
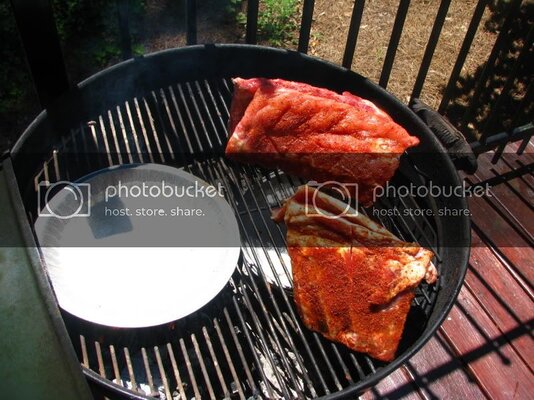
Close up the lid and let them go for about 2.5 hours, monitoring their progress about once every 30 minutes. Position the lid so that the vent is directly over the ribs, to draw the smoke over them. Judge the level of doneness by the color of the ribs, the amount of bone that is starting to show, and how flimsy they feel when you pick them up in the middle with a pair of tongs. If you can maintain 250-300 degrees, they will take 3-3.5 hours. Here's how we were looking after 1.5 hours. Notice the bark is starting to form and just a hint of bone is starting to show on the edges.
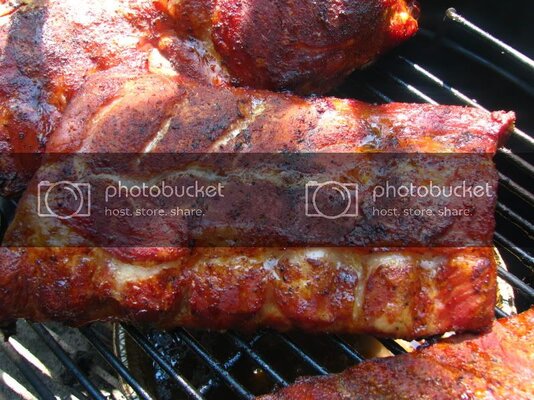
At the 2.5 hour mark, I like to hit them with a glaze of honey. It enhances the sweetness and pairs well with my BBQ sauce. Liberally coat both sides with honey using a BBQ brush.
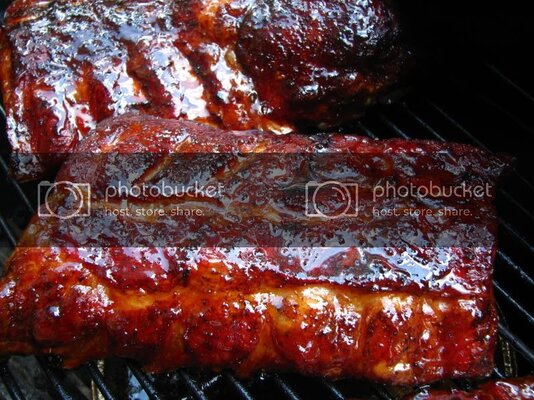
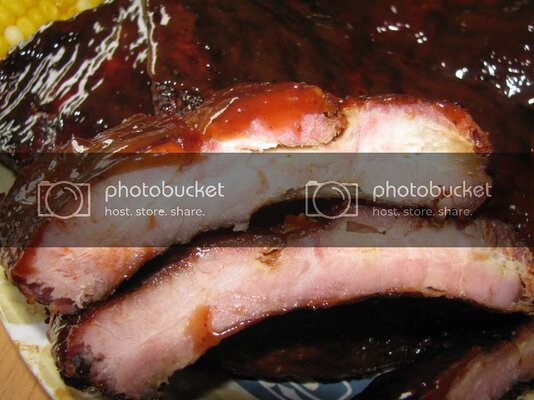
Let the honey simmer on the ribs for a few minutes, then glaze them with your favorite BBQ sauce. Let them sit on the smoker for about 20 -30 minutes on the Weber with the BBQ sauce to seal in the flavor. Or if you prefer dry ribs, skip the BBQ sauce and the honey, and bring them in at around the 3 hour mark. Keep in mind that the longer the cook lasts, the more the charcoal will have burned and the less heat that you will have, so cooking times vary a little. You just have to get a good feel for when they are done. Notice the nice smoke ring on these individual ribs.
