F
FishFinger
0
Tools and equipment
This tutorial is designed to help point new fly tiers in the right direction. When your first getting started in fly tying, the prospects can seem overwhelming. So many colorful feathers and shiny hooks to choose from; it’s hard to know where to start. Once you’ve traveled past endless rows of bins containing every bug under the sun, the next question becomes, “How do I turn that, into this…”
A good place to begin is assembling the basic tools necessary to make flies and jigs. Once you have this foundation set, you’ll be able to build and create most anything currently on the market as well as those that lurk in the deepest part of your imagination.
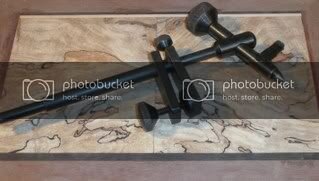
1) The first item you’ll need is a vise. There are a wide variety of vises available and they span the price range from budget to high roller. The vise pictured is an old Price Jr. It has served me well for a long, long time. I believe it sold for $59.99 back in 1982, and it’s still as effective as the day I got it.
A vise needs to, at a minimum, have a means to anchor itself to a desktop or table and an adjustable jaw system to hold the hook. As a rule of thumb, the harder the metal the better the bite. This is especially true when your attempting to work with very small hooks ranging from #18 to #22.
A material clip is a handy feature to help hold things out of the way when you have several materials staged to wrap.
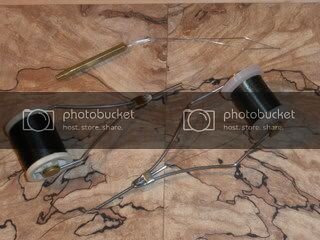
2) In order to speed up the wrapping process, a Bobbin is a very handy tool. In essence, with a vise to hold your hook, you could go old school and simply use your fingers to hold the spools of thread. A bobbin makes handling the thread much easier. You can get in tight and make very fine wraps with good control. The tension of the bobbin can be adjusted to hold the spool loose enough to dangle and smoothly release the thread when wrapping.
Just as important as the Bobbin is the Bobbin threader. The id of a Bobbins tubing is about 1/16”. The fine stainless steel wire loop is the fastest way to feed the thread through the Bobbin tube.
3) On the must have list are Scissors and Bodkins. Nothing can replace a sharp set of scissors. If I were looking to save money somewhere, I wouldn’t look here. Get the highest quality you can find. Very sharp and with a fine point. When you have to discern between a hackle fiber and a matching thread, cutting the right thing it critical; the wrong cut can cause the entire fly to come apart in the blink of an eye.
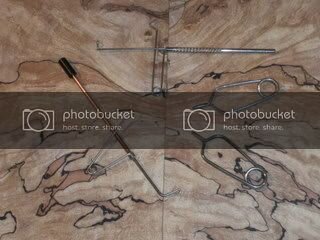
Bodkins are very useful tools. They are basically long pins with handles, that allow you get in close, align materials, pick and fluff dubbing, applying small drops of head cement to the finished fly, and clearing the eyes of hooks; inadvertently filled with head cement. Most Bodkins have a hole in the end of the handles that can slip over the eye of most, smaller hook. It’s helpful when you need to secure your work with a quick half hitch or two.
4) Perhaps not in the necessary column, tools such as whip finish tools and hackle pliers are helpful to have close by. While you can secure the knot on a finished fly with a series of half hitches, a whip finish provides a better knot which seats on itself. A better finish knot will lengthen the life of a fly and prevent it from coming untied.
When tying with multiple materials such as ribbings and small hackle, it’s nice to have a small pair of pliers to keep things in place. Clipped to the end of a thin wire or feather it supplies enough weight to keep it hanging in place while being tied in and a handle to continue advancing the material down the fly.
5) A few other tools to have are, a hair stacker, dubbing wax and head cement.
A stacking tool help to line up the tips of materials you tie in as clumps. Keeping the tips of hairs and fibers even creates a more natural presentation, when used for wings and tails and such. Often when a clump of hair or fiber is cut, the length of the materials; are not uniformed. A stacker lines everything up by the tips and can tame the “bad hair day” issue.
Getting fibers, in the form of dubbing, to stick to thread is the biggest challenge you’ll face as a fly tier. Dubbing makes up 85% of all fly patterns. It’s what make flies look buggy, or float or sink. It’s always added to thread, which is spin to the hook. Using dubbing wax aids in sticking the dubbing to the thread.
Head cement is an important final step. Even the best knot has the chance to come untied when on the water. A drop of head cement not only glosses up the head knot, it also gives the wraps and finish knots extra strength
With just these few items, you’ll be ready to begin tying your own flies and jigs.
Last edited by a moderator:


